chandler and price

Cards and Experiments

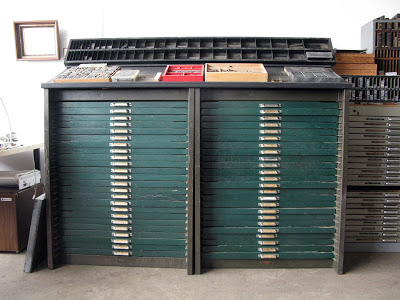
:: the tricky little lock-up ::

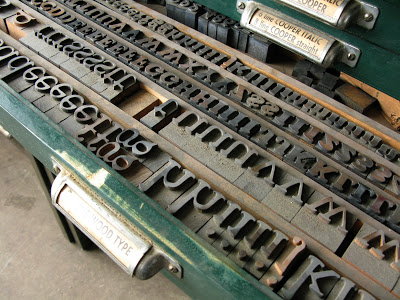
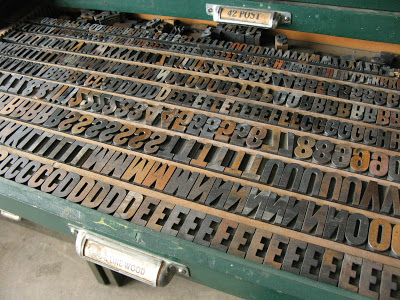
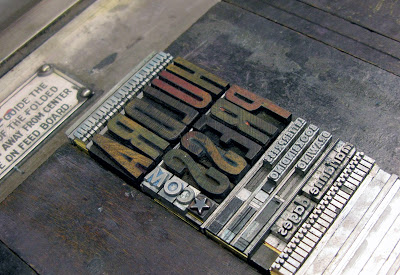
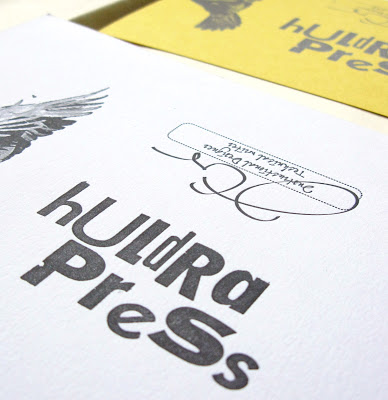
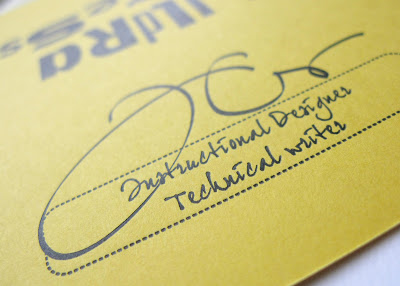
I printed some new business cards for myself last week. To save money, I set the card on wood and metal type instead of getting a polymer plate and printed the cards on scraps I had gathered from previous projects. Setting the type and getting the composition just right took some time, but the printing was quick and easy. I switched colors a few times for variety. To make them more versatile I trimmed them long and narrow so that they can double as bookmarks and price labels for books as well. 

:: done and done ::

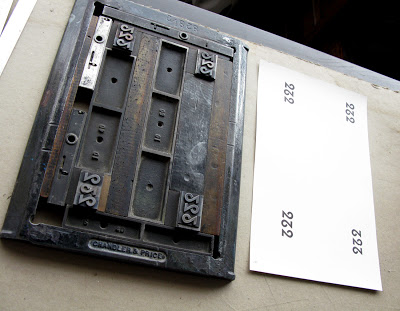
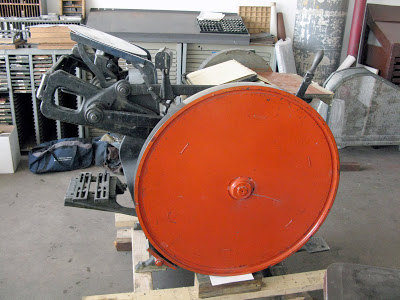
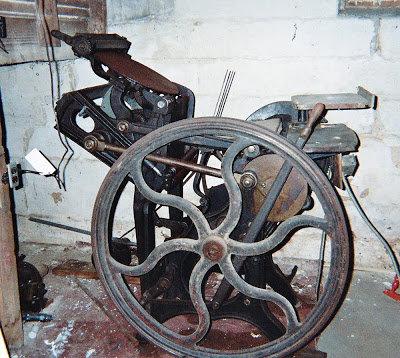
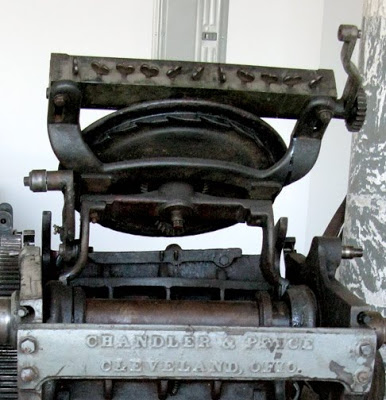
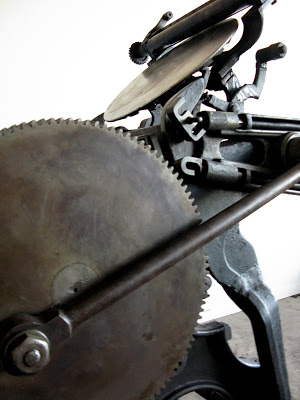
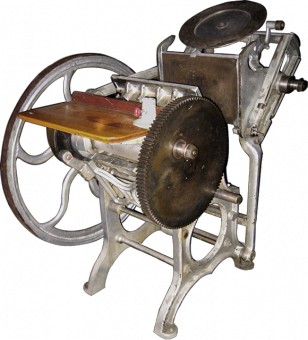
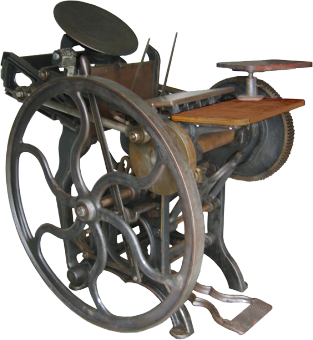
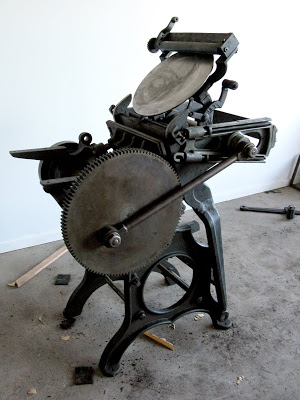
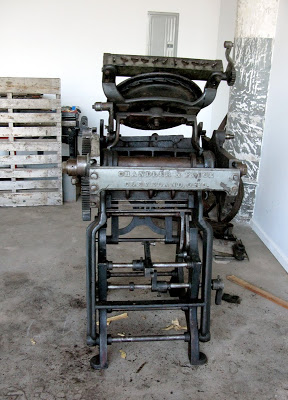
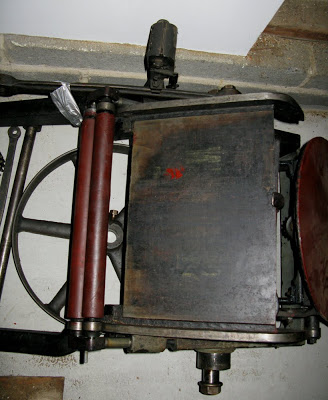
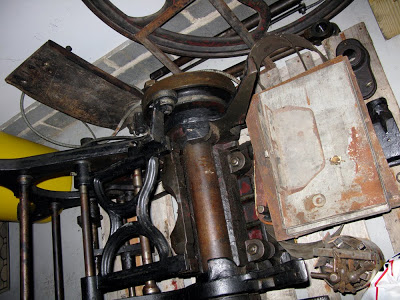
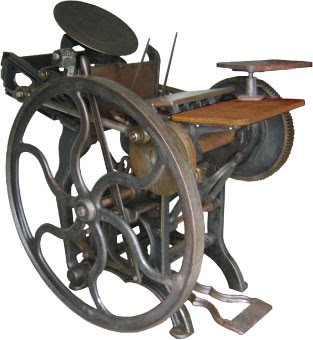
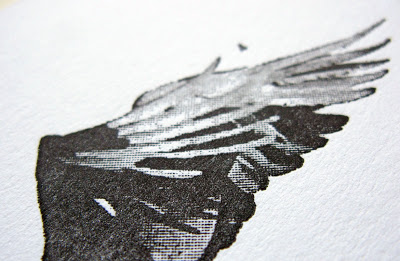
I also did some polymer plate experiments on my Chandler & Price, Junior. So far, I've only printed wood and metal type on it. Polymer is a little fussier and I was worried the results wouldn't be so great. I set up a variety of plates, a halftone, a block of large text, and another much finer lined text. Not bad at all, these aren't even the recommended deep relief polymer plates. 

:: nice ::

:: very nice ::

:: little over inked, but nice! ::

That's a relief. Good job little C&P. 

Green Days

:: that's my mom ::
Summer is here, the trees are green, and so is the new typecase! Last weekend, I visited my parents in Delaware, we took a walk in Brandywine Creek state park. I live in South Philadelphia, where apparently they hate trees for reasons I will never understand. Going to Delaware is a nice change.
:: that's my new typecase ::
Last month was very productive. I spent a lot of it cleaning and rearranging the studio, which certainly is looking better than before. I also made my first test print on the press. To give you an update on the press, all that needs to be done now is

- reattach the feed boards
- figure out where it's going to sit in the studio
- plug it in!

:: that's the Cooper wood type in the back that I'm dying to use ::

I'm so happy I bought these type cases. I didn't really have the room for them, but now that I've sold my old typecase and the galley cabinet, I know I made the right decision. Look at all that wood type!

:: and that's more wood type ::

Things are looking pretty good. There's days where I feel completely overwhelmed, but I know I'm doing something right. I just need to be patient.

The First Print

:: first print ::

This weekend, after a year of searching and false starts, cleaning and oiling, adjusting and taping, I finally pulled a print on my very own press.

It may not look like much, but this print is the beginning of much, much more...

Note: In case you're wondering why this print looks the way it does, it was a test print to make sure that the platen, the flat metal surface on which you lay your paper, was perfectly parallel to the press bed, the other flat metal surface on which your type sits. To test this, I set type in all four corners of the chase (the chase is the frame that holds your type, see picture) and adjusted the platen until all four corners printed evenly and equally.


If you're trying to do this, here's the information I found most useful.

How to Adjust/Level the Platen on a Chandler & Price

- First, make sure your rollers are set properly (this is an entirely different animal)

- Spray the platen adjustment bolts with some WD-40 and let them sit for a few minutes. While you're waiting you can do this. (adapted from Green Dolphin Press's FAQ's)

Get a cap M or H, 48 pt. or larger, something you're certain is type high. Tape a 2 pt. lead to the face. Find a piece of string a couple of feet long and tie one end around the sides of the type. Remove the tympan and all packing. Close the press, stopping it with the platen lock (under the delivery board) snapped into place and the rollers at the top of the plate.Grasp the string and let the piece of type slide down between the platen and bed on the left side. If it won't go in, the platen is too far in. If it rattles around, the platen is too far out.

- Each bolt has two nuts. The one closest to the platen, top bolt, is the one that actually raises or lowers the platen. The one furthest from the platen, bottom bolt, locks the adjustment in place. It must be loosened first to make an adjustment and then tightened once the adjustment has been made.

- Get
two wrenches.

- Use a wrench to loosen all the bottom bolts by turning them counter-clockwise. Using the type on the string as a guide, judge where the platen needs to be adjusted in or out.

- Now you can adjust the platen by turning top bolt. Turn it counter-clockwise where the platen is too far out, this will raise it and close the space. Turn it clockwise where the platen is too far in, this will lower it and increase the space.

Make you adjustments slowly, bit by bit, back and forth, using the type on the string as your guide. To lock your settings, hold the top bolt with one wrench, and tighten the bottom bolt with your other wrench.

- Put on your rollers and ink up the press. Set 4 48 point or larger, definitely type high pieces of type in all four corners about 5 picas from the edge of the chase. (see picture). Put in regular packing, a sheet of tympan paper on top, a piece of red board bellow, and a couple sheets of text weight smooth paper under that. Pull a print and take a look. Add packing if needed.

Where it's printing light, raise the platen, where it's darker, lower the platen. Look at the back of the sheet too to see make sure the impression is the same in all four corners. Remember, make your adjustments slowly, back and forth. Every time you make an adjustment, lock it in, and then pull a print. This will take a while, when you move one, it will affect the others slightly, but eventually you'll zero it in.

- Congratulations, you just leveled the platen.

Fortune Cookie

A fortune cookie told me the other day, do not let what you do not have, prevent you from using what you do have. I answered, how did you know I was secretly obsessing over not having found a Vandercook yet? It replied 39 5 12 4 7.

That cookie is right. It's so damn right. I'm lucky to have a space and great little Chandler & Price just waiting to get to work. Yes, I still want that Vandercook. Really bad. But it may be awhile before I find the right one...at the right price.

Yesterday, I took pictures of the galley cabinet, type case, and now furniture cabinet I've decided to sell. There is now a flickr set with measurements, descriptions, and prices of what I am selling to make room in the studio. I'll be posting it on Briar Press soon too.

While I was there, I shot a quick video of me turning the flywheel of the press, so you can see the motion of the press. Plus you get to see how awkward I am around cameras.


It's Press Month!

That's right, Press Month has begun. May is the month that I have decided to devote all my time and energy to getting my little C&P running and generally, putting the studio in order so that things will run a bit more efficiently at Huldra Press. Thanks to the timely arrival of the tax refund check, I'll be able to do all these things and also pay the rent.

:: that's Junior ::

It's been two months since I bought the press, during which I've given it a thorough cleaning and added oil to all the oil points. So now, when you give the flywheel a good push, it all the parts move smoothly and silently, which is very, very good.

Next, I need to
- level the press
- adjust the platen
- adjust the rollers using tape
- reattach the feed boards
- reconnect the variable speed motor

And print!

Since I don't have any exciting photographs of this great endeavor just yet, instead I'll share some things I've been looking at.

I really love David Neale's jewelry and recommend that you take a look at his charming blog and website to see the variety of work he makes. And I want these very badly.


A group of (handmade!) sketchbooks by the artist. Beautiful color and pattern.


There's something wonderfully 90's about this album art, if you follow the link, you can see a video clip of the booklet which comes with the cd, which is quite nice.

InPRESStigator!™

You know what? Fixing a press is not easy, especially if you're unfamiliar with the inner workings of the type of press you're trying to fix. I've used Vandercooks for years, and feel confident tinkering with one, because I know how it's supposed to act when it's working. But this press...

my press where it sat for 30 years unused

Is a riddle wrapped in an enigma wrapped in a vest. Recently though, I've made some more progress, and more importantly, I'm gaining confidence. I'm also coming to terms with the fact that this press will never look perfect, but it should work.

A few months ago, I found out that my press has some parts that weren't manufactured by Chandler & Price.

my press, ink disc bracket

My ink disc bracket is made up of three parts, two arms that bolt to the frame and one that lays over top, like a post and lintel. On a C&P, this is all one piece.


my press, ink disc lever

Another mystery was how come the ink disc lever, the mechanism with a little hook that turns the ink disc, was much smaller than a C&P's. It worked, it just didn't look like it was supposed to.

Lastly, there's the gripper cam.

my press, gripper cam

A C&P's gripper cam

Well, as you can see, one of these things is not like the other. I knew these parts weren't homemade repairs, because they had serial numbers on them, but I didn't understand where they could have come from.

So I did some research and found out that around 1887, Chandler & Price was not the only press manufacturer around. There were many regional manufacturers building nearly identical generic presses lumped under the description of old style Gordon jobber presses. The article George Gordon's Dream Press is a great resource if you want to learn more. I plan to buy A Catalogue of 19th Century Printing Presses by Harold E. Sterne when I have some extra dollars too.

Now that I knew that, I searched for images of "gordon jobber presses" and started finding some presses that had parts that looked like mine! Like this one, an S&L old style jobber press with a three piece ink disc bracket.

three piece ink disc bracket

And most striking, I found the Old Reliable. The Old Reliable was only manufactured for one year, 1888, and then the patents were sold to Chandler & Price.

Old Reliable

Chandler & Price Old Style

The two press's look nearly identical! So what I've come to realize is that my press is a mutt. The main frame and platen is from a 1887 Chandler & Price. The flywheel, gripper cam, ink lever, and ink disc bracket...not Chandler & Price. They could be from any number of regional press manufacturers that were around back then. I'm so glad I figured this out, because now that I know that there's plenty of other mystery presses out there that are working. Will it work even though it's a mutt? I think so.

Is that a press?

Is that what I think it is? A Chandler & Price Old Style 10 x 15? Sans flywheel? Why it is! Yes, for the first time since its purchase and dismantlement, the C&P is back on its own four feet and looking like a press again. Sort of. We still need to reattach the flywheel, drive wheel, and other important things.

Upon closer inspection, we also realized we're missing some nuts. 30 years of sitting in a basement unused will do that. I keep picturing the previous owners doing something like this:

- I need a nut for this bolt.
- Just get one off the press.

We should be able to get replacements at any hardware store. Otherwise, things are looking pretty good so far. The mechanism behind the ink disc needs some work but the platen looks great, as do the gears and the rails. Not bad for a 120 year old machine.

Pretty exciting stuff, people.

Progress

This week, I'm spending afternoons in the studio. I'm trying to get into the habit of putting aside a few hours and starting to feeling comfortable there. I can be a bit of a homebody, you see. I do like it there. The light is diffuse and comforting, I can listen to the radio, and it smells nice, like a studio. Like concrete, metal, wood, and cardboard.

I cleaned the ink disk, which was covered in 30 year old red ink. It's smooth and shiny now, sort of looks like a full moon.

I'm sorting the type I brought from North Carolina, which is very dusty, but it's quite enjoyable anyway.

I'll be leaving for the studio soon, it's almost noon already. Any podcast recommendations for getting work done? I've been listening to This American Life, Radiolab, and Wait, Wait Don't Tell Me.

The Studio! It's...Evolving!


While it may look like a decommissioned tugboat yard sale, there is progress here at Huldra Press. Progress indeed.

Last weekend, I drove to Lititz, PA and got two full cabinets of type as well as a galley rack and a mess of wood furniture and other odds and ends. The seller, a retired printer, was so friendly, a nice break from the usual curmudgeons I encounter when buying equipment. If you're in need, he's selling a 8x12 C&P and a sweet tabletop Challenge paper cutter. Like I said, super nice guy. I wish him the best.

goodies

Now it's time to break out the mineral spirits and start cleaning so I can get printing! I hope to have the press running by mid-June. But in the meantime there's work to be done. Like these...

Holy registration, Batman!

I finished these Yellow Submarine birth announcement cards, thanks to the folks at Lead Graffiti, who let me rent press time in their studio. They have beautiful studio and well maintained equipment and made me feel right a home, so I highly recommend their services if you are ever in need.

That's all for now, enjoy the weekend.

Merry 1887!


sleepy monkey cat

I went home for the holidays and got to take a closer look at my press, which is currently in storage in New Jersey. The press move was a such a blur, I didn't have time to take a close look at the thing.

Like the serial number on my Chandler & Price 10 x 15 Old Style, which is located on its dirty dirty platen. According to this list, that means this press dates from 1887. That's old. And when you're old, along the way you acquire a great deal of dust and grease and lose some parts.

One thing I'm wondering about is whether I should look for a saddle for the (not present) third roller. A third roller would help in inking large forms, although I have seen C&P's being operated with either two or three rollers. Hmm. I will have to investigate. To Briar Press!

I'm also researching the dimensions of the wooden feed and delivery boards. I'm lucky to had a Dad who's a woodworker and willing to help me make some sparkly new ones out of birch or maple.

All in all, the second inspection was very encouraging. Both the platen and the inking disc look smooth, although they'll need a good cleaning and the press seems to have been well maintained. The motor may even be salvageable!

mmm. christmas log.

Lastly, the traditional picture of the Buche De Noel that I helped decorate. It's a cake that French people try very hard to make look like a log. And it's delicious.

Merry Christmas and Happy New Year to you all.

And thank you for reading...

Best,

Marianne

The Odyssey of the Press

It's official. I own a press. All 1,500 pounds of a Chandler & Price Old Style 10 x 15 platen press neatly disassembled in my grandmother's garage in New Jersey. It needs some cleaning. New rollers, new motor, but it's in good shape. No welds or other funny business.


The story begins one month ago. I saw a post on Craigslist for an old printing press in a basement for very, very cheap. I called the seller, told him I wanted it and would pick it up in a few weeks. Done and done. Crystal clear... right?

I said, I want that! I mean, don't you?

I won't go into all the details, but fast forward to last Friday, after driving ten hours from North Carolina, my boyfriend and I found ourselves stranded without the address to the house and with a seller who would not answer our phone calls. Not good.

The next morning, we got the address! But the seller had to go into work. We would not be able to start at 9 AM like we had planned. And then later he wouldn't answer our phone calls. Again. Not good.

So like any reasonable individuals would do, we just showed up. With a U-Haul. And the resolve to not leave without a press.

We got very lucky because the seller's brother-in-law showed up, let us in, called the seller and said, hey, these nice people just drove ten hours to give you money, maybe you should be here. Thank you brother-in-law.

We started taking apart the press at 5 PM and unloaded it a 1 AM. The move went fairly well, except for a few baffling moments. Like this classic.

Oh crap.

I'll just say, it's amazing what you can do with a few come a-longs and ratchet straps. Thanks to these brave men, Mike and Dave, we got this beast taken apart without turning anyone's legs into hamburger.

my boyfriend really knows how to roll up ratchet straps.

I really do want to say thank you to my friends and Mike for helping me do this. Thank you to all of you who lent me equipment, lugged things, drove hours and hours, and hung out in a dusty basement for six hours with me. I couldn't have done it without you.

I'll keep you posted on the process of putting this thing back together. If everything goes right, it 'll look something like this.


A show, a press, and a giant floating stone head


It's been a little while, hasn't it? I've been busy, getting ready for the Core Show and so have all my dear colleagues. There's still framing to be done, but yesterday I finished my new deluxe business cards, so things are moving along. It's getting there.

There's also big news on the horizon...

Saturday, I'm picking up my new press, a 10 x 15 Chandler & Price. I'll post pictures after the move. A real bargain basement find. Literally. It's in a basement and yes, it's really a bargain. So this week, I'm gathering my wits and resources for the move. Any advice?

I know the press will need some work, but I'm beginning to feel like things are coming together. I have a hard time moving forward when I don't know what's coming next. Getting this press is making the future more concrete. A thousand pounds more concrete.

Oh, and I'm looking forward to watching Zardoz.